

How to Reduce Time to First Byte (TTFB) in WordPress: 10 Expert Optimization Strategies
March 22, 2026
How to Speed Up WooCommerce: The Definitive Performance Guide
March 24, 2026WordPress powers roughly 43% of all websites on the internet. That staggering market share makes it the single most targeted content management system by hackers, bots, and malicious actors worldwide. In my 15 years of managing WordPress sites — from small business blogs to enterprise-level platforms handling millions of monthly visitors — I have seen virtually every type of attack imaginable: brute force login floods, SQL injection exploits, cross-site scripting payloads injected through vulnerable plugins, backdoor shells hidden in theme files, and sophisticated supply-chain attacks delivered through compromised plugin updates.
The reality of WordPress security is both sobering and empowering. It is sobering because the threat landscape evolves relentlessly — PatchStack reported a 150% increase in WordPress vulnerabilities in 2021 alone, and 29% of discovered vulnerabilities went completely unpatched. It is empowering because the vast majority of successful WordPress compromises exploit well-known, preventable weaknesses. Weak passwords, outdated software, misconfigured file permissions, and neglected server hardening account for the overwhelming majority of breaches I have investigated.
This is not a surface-level overview. This is the comprehensive, technically rigorous security hardening checklist I have refined through hundreds of security audits, incident responses, and proactive hardening engagements. Every recommendation here comes from direct experience and is backed by data from organizations like Sucuri, PatchStack, and WordPress.org itself. As the WordPress Security Team wisely states, security is about “risk reduction, not risk elimination.” Our goal is to make your WordPress site an exceptionally hard target — so hard that attackers move on to easier prey.
Whether you are a site owner, a developer responsible for client sites, or a systems administrator managing WordPress at scale, this checklist will give you a clear, actionable path to a significantly more secure WordPress installation. Let us begin.
The WordPress Security Landscape in 2025
Before diving into specific hardening techniques, it is essential to understand what you are defending against. The WordPress threat landscape in 2025 is shaped by several key trends and attack vectors that inform every recommendation in this checklist.
The sheer scale of WordPress deployments creates an enormous attack surface. With 43% of all websites running WordPress, automated scanning tools can identify and target WordPress installations with trivial effort. Attackers do not need to find your site specifically — they scan entire IP ranges and domain lists looking for any WordPress installation with known vulnerabilities.
Common Attack Vectors
Brute force attacks remain the most common attack vector. Automated bots continuously attempt to log in to WordPress admin panels using common username and password combinations. The default “admin” username paired with dictionary passwords is still the number one entry point for compromised sites.
Vulnerable plugins and themes represent the largest attack surface. Third-party code is responsible for the majority of WordPress vulnerabilities. Plugins that have not been updated in over a year, themes downloaded from unofficial sources, and abandoned plugins still installed on live sites create exploitable entry points.
SQL injection (SQLi) attacks target poorly sanitized database queries in plugins and themes. Successful SQL injection can expose your entire database — user credentials, customer data, and site content.
Cross-site scripting (XSS) attacks inject malicious JavaScript through input fields, comments, or vulnerable plugin parameters. Stored XSS is particularly dangerous because the malicious payload persists in the database and executes for every visitor who views the affected page.
File inclusion vulnerabilities allow attackers to include and execute remote or local files, potentially giving them complete control over the server. These often exploit insecure file upload mechanisms or path traversal weaknesses.
Supply-chain attacks have become increasingly sophisticated. Attackers compromise legitimate plugin or theme developer accounts, inject malicious code into an update, and distribute it to thousands of sites through the normal update mechanism. This attack vector is particularly insidious because site owners trust the update process.

Understanding these attack vectors is crucial because effective security is about layered defense. No single measure stops all attacks. Instead, each hardening step in this checklist closes specific attack vectors and adds another layer of protection. When multiple layers work together, even a sophisticated attacker faces an extremely difficult path to compromise.
Server-Level Hardening
Security begins at the server level, before WordPress even enters the picture. Server-level hardening establishes the foundation upon which all other security measures rest. Get this wrong, and every subsequent layer is compromised.
File Permissions (644/755)
Incorrect file permissions are one of the most common misconfigurations I encounter during security audits. WordPress.org officially recommends 644 for files and 755 for directories. These permissions ensure that the web server can read files and traverse directories while preventing unauthorized write access.
# Set correct permissions for all directories
find /var/www/html -type d -exec chmod 755 {} \;

# Set correct permissions for all files
find /var/www/html -type f -exec chmod 644 {} \;

# Set stricter permissions for wp-config.php
chmod 600 wp-config.php

# Set correct ownership (adjust user:group for your server)
chown -R www-data:www-data /var/www/html
The wp-config.php file deserves special attention. This file contains your database credentials, authentication keys, and security salts. I recommend setting it to 600 (owner read/write only) or at minimum 640. Never leave it at 644 on shared hosting where other users might read it.
PHP Execution Restrictions
One of the most critical server-level hardening steps is blocking PHP execution in directories where it should never run. The wp-content/uploads/ directory is a prime target — attackers frequently upload PHP backdoors disguised as image files. By blocking PHP execution in the uploads directory, you neutralize this attack vector entirely.
Create a .htaccess file inside wp-content/uploads/ with the following content:
# Block PHP execution in uploads directory
# Place this in wp-content/uploads/.htaccess
<Files "*.php">
    Order Allow,Deny
    Deny from all
</Files>

# Alternative: Block all script execution
<FilesMatch "\.(php|php5|php7|phtml|pl|py|cgi|asp|aspx|jsp)$">
    Order Allow,Deny
    Deny from all
</FilesMatch>
For Nginx servers, add this to your server block:
# Block PHP execution in uploads (Nginx)
location ~* /wp-content/uploads/.*\.php$ {
    deny all;
}

# Block PHP execution in wp-includes
location ~* /wp-includes/.*\.php$ {
    deny all;
}

# Allow wp-includes/ms-files.php for multisite
location = /wp-includes/ms-files.php {
    allow all;
}
Disable Directory Browsing
Directory browsing allows anyone to see all the files in a directory when no index file exists. This information disclosure gives attackers a roadmap of your plugin structure, uploaded files, and potentially sensitive documents. Disable it immediately.
# Add to the root .htaccess file
Options All -Indexes
This single line in your root .htaccess file prevents Apache from listing directory contents. For Nginx, directory listing is disabled by default, but verify by ensuring you do not have autoindex on; in your configuration.
SSH/SFTP Only — No FTP
Standard FTP transmits credentials and data in plain text. Every login over FTP broadcasts your username and password across the network in a format any packet sniffer can capture. There is no excuse for using FTP in 2025. Use SFTP (SSH File Transfer Protocol) or SSH exclusively. If your hosting provider does not offer SFTP or SSH access, it is time to find a better host.
Additionally, disable FTP at the server level if you have root access. Remove or disable the FTP daemon entirely to eliminate this attack vector. Configure WordPress to use SSH2 for updates by adding the appropriate constants to wp-config.php if needed.
WordPress Core Hardening
With the server foundation secured, the next layer focuses on hardening the WordPress core installation itself. These measures reduce the attack surface of WordPress and prevent common exploitation techniques.
Keep WordPress Updated
This is the single most impactful security measure you can implement, and yet it is the one most frequently neglected. WordPress core updates frequently include security patches for discovered vulnerabilities. Running an outdated version of WordPress is like leaving your front door unlocked — it is an open invitation.
WordPress supports automatic background updates for minor releases (security and maintenance updates) by default. I strongly recommend keeping this enabled. For major releases, test on a staging environment first, then update promptly.
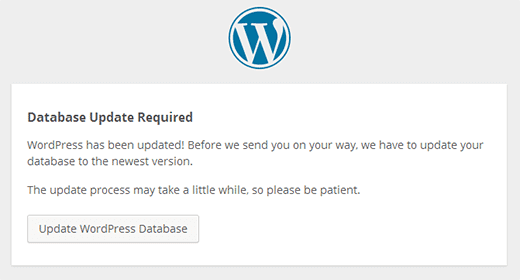
After updating WordPress core, always visit /wp-admin/upgrade.php to run any pending database updates. Outdated database schemas can create compatibility issues and security gaps. The same principle applies to plugins and themes — update them promptly, and remove anything you are not actively using.
wp-config.php Security
The wp-config.php file is the most sensitive file in your WordPress installation. It contains your database credentials, authentication keys, and critical configuration constants. There are several hardening measures specific to this file.
Move wp-config.php one level up. WordPress automatically checks one directory above the installation root for wp-config.php. Moving it outside the web-accessible directory prevents direct access even if the web server is misconfigured to serve PHP source code. If your WordPress is installed in /var/www/html/, move wp-config.php to /var/www/wp-config.php.
Regenerate security keys and salts. Visit the WordPress secret key generator at https://api.wordpress.org/secret-key/1.1/salt/ to generate fresh keys. Replace the default values in wp-config.php with these generated keys. Regenerate them periodically, especially after any suspected compromise.
Add these essential security constants to your wp-config.php:
// Disable the built-in file editor in wp-admin
define('DISALLOW_FILE_EDIT', true);

// Disable plugin and theme installation/updates from wp-admin
// Use this on production sites managed via deployment pipelines
define('DISALLOW_FILE_MODS', true);

// Force SSL for admin area
define('FORCE_SSL_ADMIN', true);

// Limit post revisions to reduce database bloat
define('WP_POST_REVISIONS', 5);

// Set autosave interval (seconds)
define('AUTOSAVE_INTERVAL', 300);

// Disable WordPress debug mode in production
define('WP_DEBUG', false);
define('WP_DEBUG_LOG', false);
define('WP_DEBUG_DISPLAY', false);

// Define the correct server address to prevent host header attacks
define('WP_SITEURL', 'https://yourdomain.com');
define('WP_HOME', 'https://yourdomain.com');
Disable File Editing
WordPress includes a built-in code editor in the admin panel that allows administrators to edit plugin and theme files directly. While convenient for development, this feature is a significant security risk on production sites. If an attacker gains admin access, the file editor gives them immediate ability to inject malicious code into any theme or plugin file.
The DISALLOW_FILE_EDIT constant disables this editor entirely. For production sites where you deploy code through version control and CI/CD pipelines, consider the stronger DISALLOW_FILE_MODS constant, which also prevents plugin and theme installation or updates from the admin panel.
Disable XML-RPC If Not Needed
XML-RPC (xmlrpc.php) is a legacy API that allows external applications to communicate with WordPress. While it serves legitimate purposes — the WordPress mobile app, Jetpack, and some pingback services use it — it is also a major brute force attack vector. XML-RPC allows attackers to attempt multiple password combinations in a single request through the system.multicall method, effectively amplifying brute force attacks by orders of magnitude.
If you do not use applications that require XML-RPC, disable it completely:
// Add to functions.php or a custom security plugin
// Disable XML-RPC entirely
add_filter('xmlrpc_enabled', '__return_false');

// Remove the XML-RPC endpoint from the HTTP headers
remove_action('wp_head', 'rsd_link');
remove_action('wp_head', 'wlwmanifest_link');
For an even more robust approach, block access at the server level:
# Block XML-RPC via .htaccess (Apache)
<Files xmlrpc.php>
    Order Allow,Deny
    Deny from all
    # Allow specific IPs if needed (e.g., Jetpack servers)
    # Allow from 122.248.245.244
</Files>
Disable REST API User Enumeration
By default, the WordPress REST API exposes user information through the /wp-json/wp/v2/users endpoint. Attackers use this to enumerate valid usernames, which they then use in brute force attacks. Restrict access to the users endpoint while keeping the REST API functional for authenticated requests:
// Disable REST API user enumeration for unauthenticated users
add_filter('rest_authentication_errors', function($result) {
    if (true === $result || is_wp_error($result)) {
        return $result;
    }

    if (!is_user_logged_in()) {
        // Block unauthenticated access to the users endpoint
        global $wp;
        if (isset($wp->query_vars['rest_route'])) {
            $route = $wp->query_vars['rest_route'];
            if (preg_match('/\/wp\/v2\/users/', $route)) {
                return new WP_Error(
                    'rest_cannot_access',
                    'Unauthorized access to user data.',
                    array('status' => 401)
                );
            }
        }
    }

    return $result;
});

// Also block author archive enumeration (?author=1)
add_action('template_redirect', function() {
    if (is_author() && !is_user_logged_in()) {
        wp_redirect(home_url(), 301);
        exit;
    }
});
Authentication Security
Authentication is your first line of defense against unauthorized access. A significant percentage of WordPress compromises begin with a stolen or weak password. Implementing robust authentication security is non-negotiable.
Strong Passwords
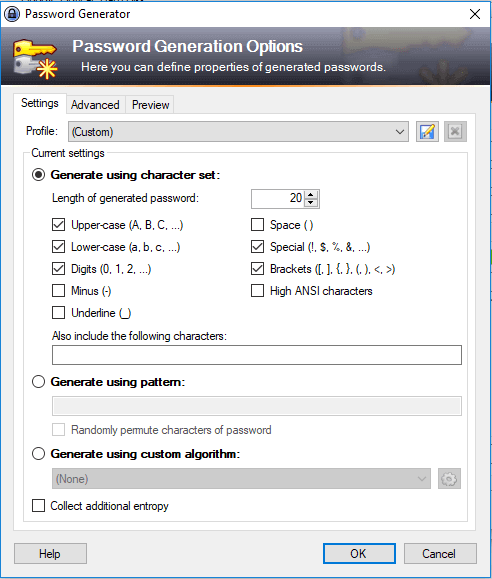
Password policy is the foundation of authentication security. Every account on your WordPress site — from administrators to editors to subscribers — should use a strong, unique password. A strong password should be a minimum of 10 characters and include uppercase letters, lowercase letters, at least one digit, and at least one special character. In practice, I recommend 16 characters or more.
WordPress includes a built-in password generator that creates strong passwords by default. Always use the generated password rather than creating your own. Human-created passwords are predictably weak, even when we think they are clever. Password managers like 1Password, Bitwarden, or KeePass make managing strong, unique passwords practical for everyone on your team.
Enforce strong passwords programmatically. While WordPress generates strong passwords by default, users can override them with weak passwords. Consider implementing a password policy plugin or adding custom validation to prevent users from setting passwords that do not meet your minimum requirements.
Two-Factor Authentication (2FA)
Two-factor authentication is the single most effective measure against credential-based attacks. Even if an attacker obtains a valid username and password — through phishing, a data breach, or brute force — they cannot access the account without the second authentication factor. I consider 2FA mandatory for every account with administrative or editorial privileges.
Time-based One-Time Password (TOTP) is the recommended 2FA method for WordPress. Plugins like WP 2FA, Two Factor Authentication, or Google Authenticator provide TOTP integration. TOTP generates a new 6-digit code every 30 seconds using an app like Google Authenticator, Authy, or 1Password.
Avoid SMS-based 2FA if possible. SIM swapping attacks can intercept SMS codes, making SMS-based 2FA significantly less secure than TOTP or hardware security keys. For highest-security environments, consider WebAuthn/FIDO2 hardware security keys like YubiKey.
Always generate and securely store backup codes when setting up 2FA. These one-time-use codes allow account recovery if the primary 2FA device is lost or damaged. Store them in a secure, offline location — not in the same password manager that stores the account password.
Limit Login Attempts
By default, WordPress allows unlimited login attempts. This makes brute force attacks trivially easy — an attacker can try thousands of password combinations without any penalty. Implement login attempt limiting to slow down and ultimately block brute force attacks.
Plugins like Limit Login Attempts Reloaded or Wordfence provide this functionality. A reasonable configuration is to allow 5 failed attempts before locking out the IP for 15 minutes, with increasing lockout durations for repeated offenses. After 3 lockout periods, block the IP for 24 hours.
Important: implement login limiting at the server or firewall level if possible, not just at the WordPress level. Application-level limiting still requires WordPress to process each request, consuming server resources. A WAF or server-level rate limit blocks the traffic before it reaches PHP.
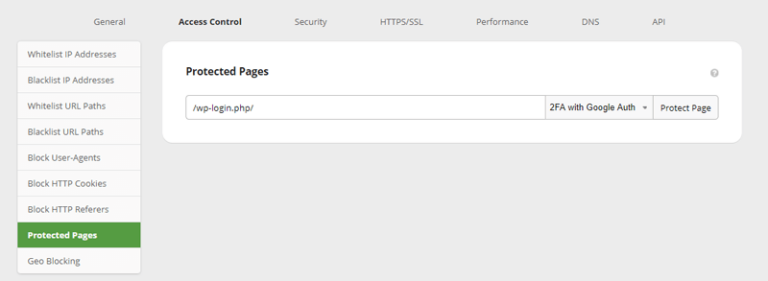
Change the wp-admin URL
While not a security measure in itself (this is “security through obscurity”), changing the default login URL reduces the volume of automated brute force attempts that target /wp-login.php and /wp-admin/. This does not stop a determined attacker who probes your site specifically, but it eliminates a significant amount of automated bot traffic.
Plugins like WPS Hide Login make this change straightforward. Choose a non-obvious URL that is not easily guessable. Avoid common alternatives like /login, /admin-login, or /secret-login. Use something unique to your organization.
Remove the Default Admin Username
The default “admin” username is the first username every automated brute force attack tries. If you still have an account with the username “admin,” create a new administrator account with a unique username, transfer all content to the new account, and delete the old “admin” account. Set the default role for new users to Subscriber to prevent accidental privilege escalation.
Database Security
The WordPress database contains everything — your content, user credentials, configuration settings, and plugin data. Securing the database adds another critical layer to your defense-in-depth strategy.
Change the Default Table Prefix
WordPress uses wp_ as the default table prefix. This makes SQL injection attacks easier because the attacker already knows the table names. Changing the prefix to something unique (like wp8x_ or sec2025_) adds a layer of obscurity that makes automated SQL injection less likely to succeed.
For new installations, set the prefix in wp-config.php before running the installer:
// In wp-config.php — set BEFORE installation
$table_prefix = 'wp8x_';
For existing installations, changing the prefix requires careful database migration. Here is the general approach — always back up your database completely before attempting this:
-- Step 1: Back up your database completely first!
-- Step 2: Rename all tables (repeat for each table)
RENAME TABLE wp_posts TO wp8x_posts;
RENAME TABLE wp_postmeta TO wp8x_postmeta;
RENAME TABLE wp_users TO wp8x_users;
RENAME TABLE wp_usermeta TO wp8x_usermeta;
RENAME TABLE wp_options TO wp8x_options;
RENAME TABLE wp_comments TO wp8x_comments;
RENAME TABLE wp_commentmeta TO wp8x_commentmeta;
RENAME TABLE wp_terms TO wp8x_terms;
RENAME TABLE wp_termmeta TO wp8x_termmeta;
RENAME TABLE wp_term_taxonomy TO wp8x_term_taxonomy;
RENAME TABLE wp_term_relationships TO wp8x_term_relationships;
RENAME TABLE wp_links TO wp8x_links;

-- Step 3: Update references in options table
UPDATE wp8x_options SET option_name = REPLACE(option_name, 'wp_', 'wp8x_')
WHERE option_name LIKE 'wp_%';

-- Step 4: Update references in usermeta table
UPDATE wp8x_usermeta SET meta_key = REPLACE(meta_key, 'wp_', 'wp8x_')
WHERE meta_key LIKE 'wp_%';
After renaming the tables and updating references, update the $table_prefix value in wp-config.php to match your new prefix. Test thoroughly before making this change on a production site.
Restrict Database Privileges
The WordPress database user should have only the minimum privileges required for WordPress to function. For normal day-to-day operations, WordPress needs SELECT, INSERT, UPDATE, and DELETE privileges. The ALTER, CREATE, DROP, and INDEX privileges are only needed during installations and updates.
On production sites, consider creating two database users: one with full privileges for updates and maintenance (used temporarily), and one with restricted privileges (SELECT, INSERT, UPDATE, DELETE) for normal operations. This significantly limits the damage an attacker can do through a SQL injection vulnerability.
Regular Database Backups
Backups are your last line of defense. If every other security measure fails, a recent, clean backup allows you to recover. Follow the 3-2-1 backup rule: maintain at least 3 copies of your data, on 2 different types of storage media, with 1 copy stored off-site. Daily database backups should be the absolute minimum for any active site. High-traffic or e-commerce sites should back up every few hours.
Verify your backups regularly. A backup you have never tested restoring is not a backup — it is a hope. Schedule quarterly restore tests to verify your backup integrity and practice your restoration procedure.
Plugin and Theme Security
Plugins and themes represent the largest attack surface in any WordPress installation. With over 60,000 plugins in the WordPress repository alone, plus thousands of premium plugins and themes, the quality and security of third-party code varies enormously.
Plugin and Theme Audit Criteria
Before installing any plugin or theme, evaluate it against these criteria:
- Last updated: Was it updated within the last 3 months? Plugins not updated for more than 6 months are a risk. Anything over a year is a red flag.
- Active installations: Higher installation counts generally indicate more community oversight and faster vulnerability discovery and patching.
- Support responsiveness: Check the support forum. Does the developer respond to security reports promptly?
- Compatibility: Is it tested with the latest WordPress version?
- Code quality: For critical plugins, review the source code. Look for proper data sanitization, nonce verification, and capability checks.
- Reputation: Is the developer or company known in the WordPress community? Do they have a responsible disclosure policy?
Remove Unused Plugins and Themes
Every installed plugin and theme is a potential attack vector, even if it is deactivated. Deactivated plugins can still be exploited if they contain vulnerable files accessible via direct URL. If you are not actively using a plugin or theme, delete it completely — do not just deactivate it. Keep only one default theme (like Twenty Twenty-Five) as a fallback, and remove all others.
Security Plugins
A dedicated security plugin provides monitoring, hardening, and incident detection capabilities that go beyond manual configuration. The major security plugins each have strengths:
Sucuri Security offers file integrity monitoring, security hardening, remote malware scanning, and post-hack security actions. It integrates with the Sucuri WAF for comprehensive protection. Its dashboard provides a clear overview of your security status and any detected issues.
Wordfence includes an endpoint firewall, malware scanner, and real-time threat intelligence feed. Its firewall operates at the application level within WordPress, which means it has deep visibility into WordPress-specific attacks but also consumes server resources.
iThemes Security (now SolidWP) provides over 30 hardening measures including file change detection, 404 monitoring, brute force protection, and database backups. It offers a good balance of features for users who want comprehensive hardening without extensive technical knowledge.

Whichever security plugin you choose, avoid running multiple security plugins simultaneously. They can conflict with each other, create false positives, and degrade site performance. Choose one comprehensive solution and configure it thoroughly.
Network Security
Network-level security measures protect your WordPress site from threats before they reach the application layer. A properly configured network security stack blocks the majority of malicious traffic without WordPress ever needing to process it.
Web Application Firewall (WAF)
A Web Application Firewall is one of the most impactful security investments you can make. A WAF sits between the internet and your WordPress server, inspecting every incoming request and filtering out malicious traffic based on known attack signatures, behavioral analysis, and custom rules.
There are two types of WAFs relevant to WordPress:
Cloud-based WAFs (Sucuri, Cloudflare, AWS WAF) operate as a reverse proxy. Your DNS points to the WAF, which filters traffic before forwarding legitimate requests to your server. The advantage is that malicious traffic never reaches your server at all, reducing load and eliminating the possibility of server-level exploitation. Cloud WAFs also provide DDoS protection by absorbing traffic spikes in their distributed infrastructure.
Application-level WAFs (Wordfence, NinjaFirewall) run within the WordPress environment. They have deeper visibility into WordPress-specific requests but consume your server’s resources to process every request. They are effective as a supplementary layer but should not be your only line of defense.
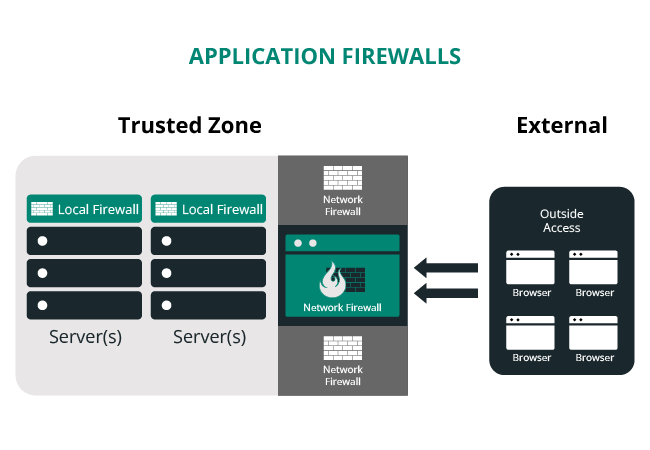
For most WordPress sites, I recommend a cloud-based WAF as the primary defense with an application-level security plugin for monitoring and post-breach detection. This layered approach provides comprehensive protection.
Security Headers Implementation
HTTP security headers instruct browsers on how to handle your site’s content, preventing various client-side attacks. These headers are simple to implement and significantly improve your security posture. Here are the essential headers and their configurations:
# Apache (.htaccess) — Security Headers
<IfModule mod_headers.c>
    # Prevent clickjacking attacks
    Header always set X-Frame-Options "SAMEORIGIN"

    # Prevent MIME-type sniffing
    Header always set X-Content-Type-Options "nosniff"

    # Enable XSS filtering in older browsers
    Header always set X-XSS-Protection "1; mode=block"

    # Control referrer information
    Header always set Referrer-Policy "strict-origin-when-cross-origin"

    # Enforce HTTPS for 1 year with subdomains
    Header always set Strict-Transport-Security "max-age=31536000; includeSubDomains; preload"

    # Content Security Policy — customize to your site's needs
    Header always set Content-Security-Policy "default-src 'self'; script-src 'self' 'unsafe-inline' 'unsafe-eval' https://www.google-analytics.com; style-src 'self' 'unsafe-inline' https://fonts.googleapis.com; img-src 'self' data: https:; font-src 'self' https://fonts.gstatic.com; connect-src 'self' https://www.google-analytics.com; frame-ancestors 'self';"

    # Permissions Policy — restrict browser features
    Header always set Permissions-Policy "geolocation=(), microphone=(), camera=(), payment=()"
</IfModule>
# Nginx — Security Headers
# Add to your server block
add_header X-Frame-Options "SAMEORIGIN" always;
add_header X-Content-Type-Options "nosniff" always;
add_header X-XSS-Protection "1; mode=block" always;
add_header Referrer-Policy "strict-origin-when-cross-origin" always;
add_header Strict-Transport-Security "max-age=31536000; includeSubDomains; preload" always;
add_header Content-Security-Policy "default-src 'self'; script-src 'self' 'unsafe-inline' 'unsafe-eval'; style-src 'self' 'unsafe-inline'; img-src 'self' data: https:; font-src 'self'; frame-ancestors 'self';" always;
add_header Permissions-Policy "geolocation=(), microphone=(), camera=(), payment=()" always;The Content-Security-Policy header is the most complex and impactful. It controls which sources the browser is allowed to load scripts, styles, images, and other resources from. A strict CSP prevents cross-site scripting attacks even if a vulnerability exists in your site’s code. However, CSP requires careful configuration — a policy that is too strict will break your site’s functionality. Test thoroughly on a staging environment before deploying to production.
For external scripts, use Subresource Integrity (SRI) to ensure that resources loaded from third-party CDNs have not been tampered with. SRI adds a cryptographic hash to the script or link tag, and the browser verifies the file matches the hash before executing it.
SSL/HTTPS Configuration
HTTPS is no longer optional. Google has used HTTPS as a ranking signal since 2014, and modern browsers mark HTTP sites as “Not Secure.” Beyond SEO and user trust, HTTPS encrypts all data transmitted between the visitor’s browser and your server, preventing man-in-the-middle attacks, credential theft, and content injection.
Ensure your SSL certificate is properly configured, redirect all HTTP traffic to HTTPS, and set the FORCE_SSL_ADMIN constant in wp-config.php. Use free certificates from Let’s Encrypt if cost is a concern — there is no valid reason to run any website over HTTP in 2025.
DDoS Protection
Distributed Denial of Service attacks flood your server with traffic to make it unavailable to legitimate users. While not a traditional “hack,” DDoS attacks can cause significant downtime and financial losses. Cloud-based WAFs like Cloudflare and Sucuri include DDoS mitigation as part of their service, absorbing malicious traffic in their globally distributed networks. This is another compelling reason to deploy a cloud-based WAF.
File Security
File-level security measures protect individual WordPress files and directories from unauthorized access and exploitation. These are some of the most impactful hardening steps you can implement, and they require only simple server configuration changes.
Comprehensive .htaccess Hardening
The .htaccess file in your WordPress root directory is a powerful tool for server-level access control on Apache servers. Here is a comprehensive set of hardening rules that I deploy on every WordPress site I manage:
# =============================================
# WordPress Security Hardening — Root .htaccess
# =============================================

# Protect .htaccess itself
<Files .htaccess>
    Order Allow,Deny
    Deny from all
</Files>

# Protect wp-config.php
<Files wp-config.php>
    Order Allow,Deny
    Deny from all
</Files>

# Block access to wp-includes directory
<IfModule mod_rewrite.c>
    RewriteEngine On
    RewriteBase /
    RewriteRule ^wp-admin/includes/ - [F,L]
    RewriteRule !^wp-includes/ - [S=3]
    RewriteRule ^wp-includes/[^/]+\.php$ - [F,L]
    RewriteRule ^wp-includes/js/tinymce/langs/.+\.php$ - [F,L]
    RewriteRule ^wp-includes/theme-compat/ - [F,L]
</IfModule>

# Disable directory browsing
Options All -Indexes

# Block access to sensitive files
<FilesMatch "(^\.htaccess|\.htpasswd|wp-config\.php|readme\.html|license\.txt|error_log|php\.ini|php5\.ini|\.user\.ini)$">
    Order Allow,Deny
    Deny from all
</FilesMatch>

# Block author enumeration via query string
<IfModule mod_rewrite.c>
    RewriteCond %{QUERY_STRING} ^author=([0-9]+) [NC]
    RewriteRule .* - [F,L]
</IfModule>

# Prevent image hotlinking (replace yourdomain.com)
<IfModule mod_rewrite.c>
    RewriteCond %{HTTP_REFERER} !^$
    RewriteCond %{HTTP_REFERER} !^https://(www\.)?yourdomain\.com [NC]
    RewriteRule \.(jpg|jpeg|png|gif|webp|svg)$ - [F,NC,L]
</IfModule>
Block PHP Execution in Uploads
This critical rule deserves emphasis. The uploads directory should only contain media files — images, PDFs, documents. There is no legitimate reason for PHP files to exist in the uploads directory. By blocking PHP execution here, you prevent attackers from executing uploaded backdoor scripts even if they manage to upload a malicious PHP file through a vulnerable plugin.
Create a .htaccess file at wp-content/uploads/.htaccess with the rules shown in the Server-Level Hardening section above. This is one of the highest-impact, lowest-effort security measures you can implement.
Protect wp-config.php
In addition to moving wp-config.php one level up and setting restrictive file permissions, block all web access to it via .htaccess as shown in the comprehensive ruleset above. This defense-in-depth approach means that even if one protection fails, the others still guard this critical file.
Disable Directory Listing
As covered in the server-level section, Options All -Indexes prevents Apache from showing directory contents. Additionally, remove the readme.html and license.txt files from your WordPress root after every update. These files disclose your exact WordPress version, which attackers use to identify applicable exploits.
Monitoring and Incident Response
Even the most thoroughly hardened WordPress site can be compromised. A zero-day vulnerability in a plugin, a sophisticated social engineering attack against a team member, or a misconfigured server update can create an opening. This is why monitoring and incident response planning are essential components of a complete security strategy.
File Integrity Monitoring
File integrity monitoring (FIM) continuously checks your WordPress files against known-good baselines, alerting you when files are added, modified, or deleted unexpectedly. This is one of the earliest and most reliable indicators of compromise. Security plugins like Sucuri and Wordfence include file integrity monitoring that compares your WordPress core files against the official WordPress repository.
Configure your FIM to alert immediately on any changes to core WordPress files, plugin files, and theme files outside of known update windows. Pay special attention to unexpected PHP files in the uploads directory, modifications to wp-config.php, changes to .htaccess files, and new files in the WordPress root directory.
Security Logging
Comprehensive logging provides the forensic trail needed to understand what happened during a security incident and how to prevent it from recurring. At minimum, log the following events: all login attempts (successful and failed), user creation and deletion, plugin and theme installations and updates, file changes, admin settings changes, and database modifications.
Store logs on a separate system from your web server. If an attacker compromises your server, locally stored logs can be modified or deleted to cover their tracks. Send logs to a remote SIEM (Security Information and Event Management) system or at minimum to a separate server.
Backup Strategy: The 3-2-1 Rule
Your backup strategy is your ultimate safety net. Follow the 3-2-1 rule rigorously:
- 3 copies of your data (production plus two backups)
- 2 different storage types (e.g., local disk and cloud storage)
- 1 off-site copy (in a geographically separate location)
Back up both files and the database. Your backup solution should support incremental backups for efficiency and retain multiple backup generations so you can restore to a point before a compromise occurred. Solutions like UpdraftPlus, BlogVault, and VaultPress (Jetpack Backup) provide automated WordPress-specific backups with off-site storage.
Schedule weekly full backups and daily incremental backups at minimum. For high-traffic or e-commerce sites, real-time backups triggered by database changes are ideal. And as I stated earlier, test your restores regularly. A backup you cannot restore from is worthless.
Incident Response Plan
Every organization running WordPress should have a documented incident response plan. When a security incident occurs, panic and ad-hoc responses lead to mistakes that can make the situation worse. A documented plan ensures a systematic, effective response. Your incident response plan should cover these phases:
- Identification: How will you detect a breach? Monitoring alerts, user reports, Google Search Console warnings, or hosting provider notifications. Define what constitutes a security incident versus a false positive.
- Containment: Immediate steps to stop the bleeding. This may include taking the site offline, changing all passwords, revoking all active sessions, and blocking suspicious IP addresses. Have the commands and procedures documented in advance.
- Eradication: Find and remove all malicious code, backdoors, and unauthorized accounts. This often requires a line-by-line review of modified files and database entries. Sucuri and other security firms offer professional malware removal services for complex compromises.
- Recovery: Restore the site from a known-clean backup if necessary, apply all security patches, and verify the site is fully functional and free of malicious code before bringing it back online.
- Lessons Learned: After every incident, conduct a post-mortem. Determine how the attacker gained access, what they did, what worked in your response, and what needs improvement. Update your security measures and incident response plan based on these findings.
The Complete WordPress Security Hardening Checklist
Here is the consolidated checklist summarizing every hardening measure covered in this guide. Use this as your actionable reference when securing a new WordPress installation or auditing an existing one.
Server-Level Hardening
- Set file permissions to 644 for files and 755 for directories
- Set wp-config.php permissions to 600
- Block PHP execution in wp-content/uploads/
- Block PHP execution in wp-includes/
- Disable directory browsing (Options All -Indexes)
- Use SFTP/SSH only — disable FTP
- Keep server software (PHP, MySQL/MariaDB, Apache/Nginx) updated
WordPress Core Hardening
- Update WordPress core promptly after each release
- Run database updates after every core update
- Move wp-config.php one level above the web root
- Regenerate security keys and salts
- Add DISALLOW_FILE_EDIT constant
- Add FORCE_SSL_ADMIN constant
- Disable WP_DEBUG in production
- Disable XML-RPC if not needed
- Disable REST API user enumeration
- Remove readme.html and license.txt files
Authentication Security
- Enforce strong passwords (16+ characters recommended)
- Implement two-factor authentication for all admin and editor accounts
- Limit login attempts (5 attempts, then lockout)
- Change the default wp-admin login URL
- Remove any account with the username “admin”
- Set default user role to Subscriber
- Use a password manager for all team members
Database Security
- Change the default wp_ table prefix
- Restrict database user to SELECT, INSERT, UPDATE, DELETE only
- Use a strong, unique database password
- Schedule daily automated database backups
- Test backup restoration quarterly
Plugin and Theme Security
- Audit all installed plugins and themes against security criteria
- Delete (not just deactivate) unused plugins and themes
- Keep all plugins and themes updated
- Install and configure a comprehensive security plugin
- Never install plugins or themes from untrusted sources
Network Security
- Deploy a Web Application Firewall (cloud-based recommended)
- Implement all security headers (X-Frame-Options, CSP, HSTS, etc.)
- Configure SSL/HTTPS properly with certificate auto-renewal
- Enable DDoS protection
- Use Subresource Integrity for external scripts
File Security
- Deploy comprehensive .htaccess hardening rules
- Protect wp-config.php from web access
- Block access to sensitive files (readme.html, license.txt, error_log)
- Block author enumeration via query string
- Prevent image hotlinking
Monitoring and Incident Response
- Enable file integrity monitoring
- Configure comprehensive security logging
- Send logs to a remote/external system
- Implement 3-2-1 backup strategy
- Document and test your incident response plan
- Schedule quarterly security audits
- Register for WordPress security mailing lists and vulnerability databases
Conclusion
WordPress security is not a one-time task — it is an ongoing discipline. The checklist in this guide represents the culmination of 15 years of securing WordPress sites across every industry and scale. Every measure here addresses a real, observed attack vector that I have seen exploited in production environments.
The most important takeaway is the concept of defense in depth. No single security measure is sufficient on its own. File permissions will not save you if your admin password is “password123.” A WAF will not help if a team member installs a backdoored plugin from an untrusted source. Two-factor authentication is useless if your server has not been patched in two years. It is the combination of all these layers working together that creates a security posture strong enough to withstand the constant barrage of attacks that every WordPress site faces.
Start with the highest-impact items: update everything, implement strong passwords with 2FA, deploy a WAF, and set correct file permissions. Then work through the rest of the checklist systematically. Do not try to implement everything in a single day — prioritize, plan, and execute methodically.
Remember: security is risk reduction, not risk elimination. Our goal is not to create an impenetrable fortress — that does not exist. Our goal is to make your WordPress site such a hard target that the vast majority of attackers move on to easier prey, and to have the monitoring and response capabilities in place to detect and respond swiftly if a sophisticated attacker does find a way in.
Stay vigilant, keep learning, and never stop hardening. Your site’s security depends on it.
References
- WordPress.org. “Hardening WordPress.” https://developer.wordpress.org/advanced-administration/security/hardening/
- Sucuri. “How to Harden WordPress Security (2024 Guide).” https://sucuri.net/guides/how-to-harden-wordpress/
- PatchStack. “State of WordPress Security in 2024.” https://patchstack.com/whitepaper/state-of-wordpress-security-in-2024/
- WordPress.org. “Security Keys and Salts Generator.” https://api.wordpress.org/secret-key/1.1/salt/
- OWASP. “Web Application Firewall.” https://owasp.org/www-community/Web_Application_Firewall
- Mozilla. “HTTP Security Headers.” https://developer.mozilla.org/en-US/docs/Web/HTTP/Headers
- Google. “HTTPS as a Ranking Signal.” https://developers.google.com/search/blog/2014/08/https-as-ranking-signal
- web.dev. “Security Best Practices.” https://web.dev/articles/security-headers